Organ Voicings by Mark Williams |
| Introduction by Mark Williams |
|
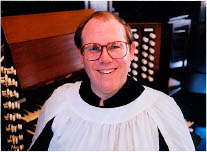
Fellow organists, organ builders, and Hauptwerk enthusiasts, I am Mark K. Williams. As a full-time organist at Christ Church Anglican (1733) in Savannah, Georgia (USA), I also am an organ builder and organ voicer/tonal finisher.. In 2008, I designed and constructed a 3-manual Hauptwerk organ from the ground up in our historic home in Savannah, Georgia (USA). As I searched for instruments to add to my organ library, I came across Les Deutsch. Without doubt, Dr. Les Deutsch is owed a debt of gratitude by the Hauptwerk organ community as a second-generation digital organ designer, for his creative and on-going creation of significant composite organs. This splendid musician, digital organ designer, arranger, and computer guru has put together several fine organ designs for the Hauptwerk user creating substantial 3-manual instruments from either public-domain instruments or instruments that are wholly affordable. Happily, all fit within 4GB of RAM using Windows XP64. |
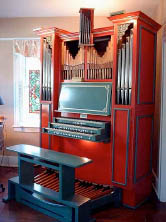 Williams 2008 Hauptwerk Organ
|
As I began to play through these organs, some of which have become not only my favorite instruments but among the finest of the 24 organs that I have collected in my instrument library, I began to communicate quite frequently with Les. This led to my commitment to spend some serious time with these instruments and to voice them to the finest degree possible within my experience as an organist, builder, and voicer/tonal finisher. (Note: Although I can not alter or manipulate the actual pipes of a Hauptwerk organ, as they are digital samples of real pipes, I can alter their volume and brightness (voicing) as well as their tonal balance within the divisions of the instrument (tonal finishing). For the sake of ease, I will refer to my work on these instruments as “voicing”, although in a stricter sense, my work is as much or more “tonal finishing”. Along the way, Les and I realized that a vehicle must be designed to allow these professionally voiced organs to be shared with the Hauptwerk community. To this end, Les came up with an application that allows organ voicings to be shared between Hauptwerk users. He then agreed to post my voicings of his organs on his fine website and asked that I provide a written explanation of my voicing practices (see below). My hope is that you will give these instruments a try as not only have I found them to be a substantial addition to my own Hauptwerk organ library, I believe you will as well.
|
| |
| Skip to organ downloads |
| |
| Important Information About Volume Controls and Voicing |
| |
Although these instruments have been carefully and finely voiced over a considerable period of time, there will always be a difference between the sound system that I used to voice the instruments and the sound system that others will play these organs through. I use several studio reference monitors as well as two hi-end surround sound stereo systems, all carefully tweaked, for amplification in my voicing work. As I have no part in the system you will choose for amplification, I am certain that notes within each rank will “stick out” from my original voicings of these organs as speakers, rooms, and methods of digital reverberation are different from one Hauptwerk setup to another.
Also, I have noticed the largest detrimental change in voicing work comes when the Master Volume for an organ from within the Hauptwerk application is increased from the volume level in which I performed the voicing of the instrument (the volume setting that comes up when you first load the organ with my voicings). However, increasing or decreasing the master volume on your computer volume output or of your speaker system will have very little effect on the organ’s voicing as these changes are outside of the Hauptwerk application. Therefore, I have provided a list of each instrument below and the Master Volume level setting within the Hauptwerk application in which I performed the voicing for each of the instruments. I can not stress enough how important it is to leave the internal Master Volume for each instrument within the Hauptwerk application at the volume in which I performed the voicing work if you want a positive end result. Changing the Master internal volume will require your revoicing the entire instrument top to bottom. Yes, Hauptwerk’s internal response to volume changes combined with digital reverb is that responsive and that good! So long as Master Volume changes are made outside of the Hauptwerk application, balance between stops within a division and between divisions should remain fine as well as the tonal work and shaping performed on each stop between different sound systems.
Furthermore, it should be quite simple for the Hauptwerk owner, using the Advanced Edition of Hauptwerk, to open the voicing controls for a particular organ and go through all of the stops of an organ one by one to adjust the volume of any notes that stick out/sound too loud or too soft given your particular sound system, organ room, and digital reverb system. I can perform a simple volume check on a 3-manual 60-stop instrument in about 3-4 hours time simply running chromatic scales at a medium tempo stop by stop, division by division. This will afford you the advantage of playing these marvelous instruments with the extensive voicing work that I have performed on them as well as tailoring them to work optimally with your own sound system, organ room, and reverb. Note: I have found it most helpful to change the MIDI channel assignment of the Pedal division to play from one of the keyboards while voicing. This has saved both my back and my ankles from running endless chromatic scales on the Pedals while voicing the Pedal division stops. |
| |
| Reverb Environment Used With These Voicings |
| |
Convolution/Impulse Response reverb was used while voicing each instrument as the room acoustic where any organ resides is about 70-80% of the instrument’s quality of sound. I could have voiced the instrument in a dry acoustical environment, however, I discovered the instruments responded to the wet environments as truly as they would in a real acoustical space and so I had to voice them in the digital acoustical space in which I planned to regularly play them. The software application Reaper was used in combination with the application Pristine Space and the freeware impulse response room samples below (one dry room, one medium reverb, and two long reverb files are included here along with the mixer settings I use in the Reaper application.). Note: I used Large Room 1.1 for all of my organ voicings.
Because Reaper's RPP files do not download easily from this server, each of these filens has been compressed to a "zip." After downloading them, please expand them before installing in Reaper.
|
Reaper File: Large Room 1.1 (Impulse Reverb File: Vocal Plate 1)
Master Volume +10.9 db
Wet Front -15.5db
Dry Front -11.3db
Reaper File: (Very) Large Room 1.2 (Impulse Reverb File: Vocal Plate 1)
Master Volume +10.9db
Wet Front -8.95db
Dry Front -11.3 db
Reaper File: Medium Room 3 (Impulse Reverb File: cAPS_ccp-xy5)
MasterVolume +10.9db
Wet Front -15.5db
Dry Front -11.3db
Reaper File: Small Room 1 (Impulse Reverb File: Nice Middle Room 1)
Master Volume +10.9db
Wet Front -12.6db
Dry Front -11.3 db
|
To date, I have found no better available room samples than these and no better convolution reverb application than Reaper (I use v. 2.006) combined with the native audio VST plugin: Pristine Space. I have also found myself frequently lost in the sound environment produced by this convolution reverb process using impulse reverb sample files. It is quite stunning. This link will connect you to the background and set up of convolution reverb for your instrument. It is well worth your time.
Watch this YouTube video on adding convolution reverb to Hauptwerk 4 with Reaper. (Note: click CC to read the captions and use pause to take you through each step of the video)
Other links to help you install reverb with Reaper:
Pristine Space website
Reaper website
Note: In the Reaper app., check the Wet Front Channel, click the fx button and be certain that the correct corresponding Reverb Impulse file is loaded on this page through the Pristine Space plug in. This single item has tripped me up far too many times. |
| |
| On Tuning Temperaments |
| |
I have experimented extensively with the many tuning schemes available within Hauptwerk. I now play all of Les’ Deutsch’s instruments (with the exception of the Theater Organ) in the Kellner temperament. I have found the resulting sound to be more colorful, interesting, and carrying of a slightly antique/historic sound without sounding sour or strident to the ear. I encourage you to give this a try as well. Here is some excellent information on the subject provided by Mr. Nigel Taylor of England.
|
The revival of unequal temperament (well-tempered tuning) is slowly but surely gathering pace. The discovery in 1975 by Dr. Herbert Anton Kellner, that Bach's tuning for "Das Wohltemperirte Clavier" (The Well Tempered Clavier) was for unequal temperament and not equal, was certainly a major factor that triggered off this revival. We are fortunate to live in an age when we are able to listen to the expression and variety that unequal temperament gives, in contrast to the colorless uniformity of equal temperament.
Recent research by Dr. Bradley Lehman suggests that Bach used, for his Well-Tempered Clavier, not equal temperament as formerly thought, but a temperament like Kellner’s, which gives very pleasing results, each key having a distinct flavor, but none sounding badly out of tune. If one listens to a Scarlatti sonata on a harpsichord tuned to unequal temperament, and then listens to the same sonata played on a similar instrument tuned to equal temperament, the difference is most pronounced in equal temperament, both the instrument, and in consequence the music, lose much of their expression and character. The general effect is bland and oily. In unequal temperament, the instrument and music come to life; the music is colorful and exciting. Bach and others) wrote music, which exploited unequal intervals to enhance the effect and expression.
|
| |
| Voicing/Tonal Finishing Procedures I Employed, Step-by-Step |
| |
Although I have already carefully performed the procedures below on Les Deutsch’s instruments, he and I thought you might want to know what I had done (my voicing approach to organs) and that if you like the result you might want to try your hand at another instrument on your own. Clearly voicing organs is an art and requires much listening, deep and careful listening, an ear attuned to tonal colors, discernment of how a stop fits into a division and its soundscape and then how that division combines with other divisions to create even more soundscapes. With that said, here is my approach to voicing/tonal finishing on an instrument:
First, start with the Great – Whenever I begin voicing a new organ, the first thing that I do within a particular division is to spend time with each stop’s brightness setting (found in the Advanced Edition of Hauptwerk under the Organ Settings pulldown > Pipe and Rank Voicing > Brightness choice from the voicing options menu > use MSTR slider on the left to change the overall brightness of a stop). I start with the 8’ Principal and I listen to the changes in the stop as I manipulate the MSTR (Master) brightness slider gently up and down. The critical thing that I am listening for is when a sample pipe in the stop (say middle G) begins to sound like it has arrived at its “home sound” while speaking through my own particular sound system in my particular organ room. I voice for the best sound “at the bench” rather than “out in the room” as thus far I am the primary audience for the instruments I have voiced. You will hear when the sound of the pipe becomes forced, strident, and too bright. You will also hear when the sound of the pipe becomes artificially covered and is no longer the free sound of the pipe speaking naturally. I then, using the MSTR slider, set all of the pipes in that rank to the new brightness level. I proceed through each stop within the division that I am working on and perform this first process of careful listening and familiarization with each stop before advancing to the next step of setting volumes. This, because, brightness settings affect perceived volume by the ear and so brightness choices must be made first. (I also go through each rank listening for individual pipes that are too bright or have too much wind in them and adjust their brightness levels to match the other pipes in the rank.)
Next, proceed to set the main overall volumes of your stops one-by-one using the voicing controls in the Advanced Edition of Hauptwerk (found under the Organ Settings pulldown > Pipe and Rank Voicing > MSTR slider on the left). Set your 8’ principle on the Great MSTR volume. Then set your 4’ Octave to sing above it as the primary Plenum “singing stop”. Set your 2’ Principal the same volume as the 8’ Principal. Set your mixture the same volume as your 4’ octave. Set your 16’ to add depth without muddiness. And then set your 8’ trumpet/reed to add color and fire without taking over. |
Note: If you choose to move a stop’s "master volume" up some, you will need to check your voicing note-by-note again for that particular stop. If you choose to raise the instrument’s main overall volume, you will need to check every note of every stop on the organ again for voicing and balance. Changing either an individual stop’s volume or the overall organ’s volume level within the Hauptwerk application will affect your previous voicing work.
|
Now go ahead and voice each stop individually for uniform balance, color, brightness and treble ascendancy. (Note: Treble ascendancy is the voicing practice that begins a slight increase in volume within a stop from tenor A through the top note of the stop. From tenor A down the volume is kept flat with a slight tapering off in the bottom octave. This is usually only performed on principals and flutes. This means that when you play a piece of music, the soprano voice will be heard above the alto voice, the alto above the tenor, and so forth. Employing treble ascendancy provides for increased clarity between voices and less muddiness in the overall sound coming from the lower voices.)
Check your Principal Chorus again for balance now that you've added treble ascendancy.
And then for a final polishing, play your 8’ Principal against your 2’ Principal and listen for notes sticking out. Do the same with 8’ Principal against the Mixture and again against for 4’. Listen for notes not coming together as a total sound and adjust them.
Note: Be certain to run all notes chromatically both up and down the keyboard several times as you voice a stop. You will hear notes and how they “fit” into the sound differently on an ascending chromatic scale and a descending one. I also play literature (a hymn or two and a piece or two of polyphony) as I always find notes here and there that are not in balance when I do. I then “go searching” for the stop that has a note out of balance by eliminating stops one by one until I discover the home of the offending note.)
Mutations Stops – Note: Stops such as 2 2/3’, 1 1/3’, etc. I generally slowly taper off quite a bit starting at Tenor A going down to low C. In particular, these stops clutter the sound and lose their cohesiveness and particular beauty in the soundscape within the lower octaves.
Move onto the Flutes – Set your main volumes for each first as you did with your principals. Your 8’ flute should blend nicely and support your 8’ Principal and be just under its volume. The 4’ flute should sing with the 8’ Flute without becoming too strong. The 2’ and 2 2/3’ should be each set so they add color to the 8’ without taking over.
Then go ahead and voice each stop individually for uniform balance, color, brightness, and treble ascendancy.
And then for a final polishing, play your 8’ flute against your 2’ and listen for notes sticking out in volume or brightness. Do the same with 8’ principal against the 2 2/3’ and again against for 4’ and then the 1/1/3 too. Listen for notes not coming together as a total sound and adjust them accordingly.
Move on to the Choir/Positive – Set the Choir division’s main Principal Chorus volume to be a tad under the Great Principal Chorus volume and then proceed in a likewise fashion with rough and final voicing work. Listen to the total principal chorus note by note to hear how the sounds come together and listening for balance and blend.
Move on to the Swell – Set the Swell’s main Principal Chorus volume to be a tab under the Choir’s Principal Chorus volume and then proceed in a likewise fashion with rough and final voicing work. Listen to the total principal chorus note by note to hear how the sounds come together and listening for balance and blend there. Strings should be roughly the same volume as the 8’ flute. The 4’ and 16’ reeds should sing nicely with the 8’ Trumpet. There will come a time in your balance work when you will hear the 4’ and 16’ reeds enhance and surround the 8’ Trumpet without enveloping and dominating it. Play some homophonic music and will know when you have achieved this balanced sound in your reed chorus.
And finally the Pedal Principal Chorus should match in volume that of the Great Principal Chorus if not slightly louder. The Flute Chorus should also match the Great Flutes in volume. Reeds should add color and fire without dominating the sound.
Non-chromatic listening – While performing final voicing on a stop, listen to the black notes up and down (octave by octave) throughout the entire compass of the keyboard and then the same with the white notes, octave by octave, up and down. It is always amazing what your ear will pick up that was hidden in the chromatic playing and listening that will be revealed afresh in this way.
NOTE: As a final test, you must play homophonic and polyphonic literature and do a lot of careful listening. The instrument and its voicing will reveal a great deal to you through playing literature as a final test. You will also find, inevitably, that when you come back to the instrument after some time away from it that your ears will hear things that they had missed or corrected for in your head in a previous voicing session. Do not let this frustrate your efforts, you are not going crazy. Your ear/brain connection was just tired and missed some items last time you worked on the instrument. Tonal finishing is indeed both an artistic as well as an organic endeavor.
Final Voicing and TOnal FInishing of Principal Choruses – a Method
1. In each principal chorus, establish your 8’ Great principal volume (loud enough to provide a foundation and singing well into the room). The 4’ octave should then sing above the 8’ principal….it is the “singing” stop in the principal chorus. The 2’ should ride on top of the 4’ providing brightness and character. And finally, the mixture should ride above the 8’, 4’, and 2’ without over dominating. A good rule of thumb is that the 8’ and 2’ should be approx. the same volume and the 4’ and the mixture likewise should balance each other as a pair. In the end, what you are looking for is three principal choruses on the three manuals (or two) that are of different character and volume one from the other. I like to make the Great the loudest, the Swell just under the Great, and the Choir or Positive just under the Swell…personal taste. (Note: if you are fortunate enough to have a fourth principal chorus in the pedal…it should equal the Great or Swell principal choruses in volume and be voiced in the same manner.)
2. Listen to stick outs, 8’ pitch first and then 4’, 2’, and finally the mixture. Listen to black notes first, octave by octave, and then white notes on each stop. (Note: sometimes a note will stick out due to volume, but sometimes it will be a brightness issue or a combination of both.)
3. From middle C up on the 8’, make each ascending note a tad louder than its preceding neighbor. Then listen for stick outs chromatically descending only from the top of the keyboard. If you listen ascending, you will tend to even out the ascendency work you have done. Now do this to the 4’, 2’, and finally the mixture. From middle C down (or tenor A), the volume should be even all the way down or taper down in the lower two octaves (depends on the room and personal taste). This work is called “treble ascendency” and will allow the listener to hear the soprano above the alto, alto above the tenor, and tenor above the bass lines.
4. Now listen to the 8’ and 2’ together, listening for any unbalanced notes. Do this black notes and then white as before an octave at a time. Now add the 4’ and do the same. And finally add the mixture and do the same. This work will provide you with treble ascendency in the principal choruses and blend and balance within each principal chorus. In time, your ear will be able to hear more clearly the needs of each stop in your voicing/tonal finishing work. The work is a musical art, this “painting with sound”, and the instrument will inevitably tell you what it needs, especially when you begin to actually play literature.
Best of luck in all your organ endeavors. |
| |
—Mark K. Williams (Savannah, GA) USA |
| Les' Instruments as voiced by Mark Williams |
| |
| First, thank you Mark for applying your professional expertise to this project. As any who has done tonal organ finishing knows, this is a huge amount of work. The fact that these organs use sampled sounds rather than actual pipes reduces the physical agility needs to crawl through chambers or climb ornate facades, but the number of adjustments that are made is nearly the same. Hauptwerk's professional edition allows the user to make most of the same adjustments on each virtual pipe as would be done on a pipe organ. The results are stored in a configuration file. There is a unique configuration file for each Hauptwerk organ in each computer installation. Unfortunately, these files are not easily shared among organists. Although it is possible to move these configuration files between Hauptwerk installations, one does so at one's own risk. This is not supported by the developers of Hauptwerk and could result in unexpected sounds or a non-functioning organ if not handled exactly right.
This is why I developed my own software to "read" these configuration files and merge their data back into the organ definition files – the files that are used to load Hauptwerk organs. This is why I do not make Mark's configuration files available. Instead, I have taken each file, folded it back into the original organ, and created completely new organs. Each of these "Mark Williams edition organs" is downloaded and used in the standard way. I have given each a new "organ ID" so that you can have both my original version and the Mark Williams version installed. You can use either one as desired, moving back and forth to hear the various things Mark has done. In some cases, Mark has used an older version of the organ (e.g. the Model 945 he revoiced is V1.1) in which case there may be some features that will not be available (in this case, the crescendo pedal.)
Mark has suggested that the Haupwerk master volume controls be set for each instrument as indicated below. This should create a set of organs with approximately the same overall volume and be true to Mark's conception of the voicing.
In the end, there is a great deal of subjectivity to voicing. You might prefer one version over the other – or perhaps this will inspire you to have a go at the voicing controls yourself to create your own, more personalized instrument. |
| |
|
| |
|
|